How to add an image to a page (Back to Help Page) (Print Page)
Images with a blank space in its file name, like Picture One.jpg will
need to be renamed to PictureOne.jpg (Removing the blank space) before
uploading or they may not display on your page.
It is best to keep your images below 100k in file size check out the
Working with images help file for details on
how to resize your photos.
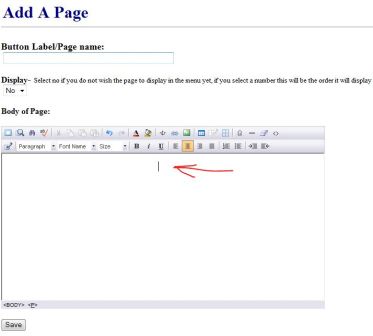
To add an image to a page, open the page for editing,
place the curser into
the HTML (Body of Page) field where you would like the image.
Click on the image icon.
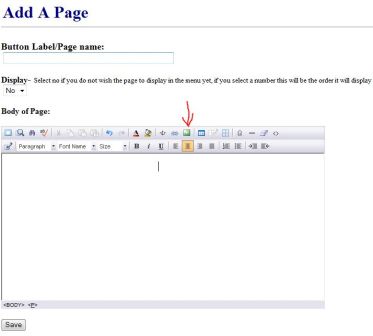
If you click on the Image Icon/button, and no box comes
up, click on the tools menu of Internet Explorer and turn off the POP-up
Blocker, then restart Internet Explorer and try again.
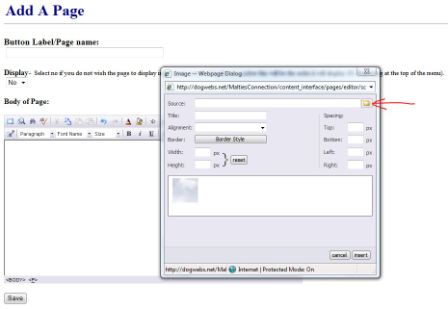
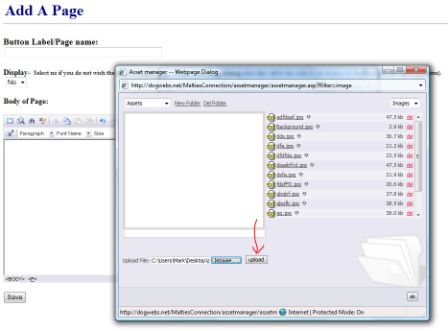
Then in the box that comes up click on the folder
icon to the right of the source field, this will bring up the Asset manager, in
the asset manager you can upload images/files to use on your site.
To add an image, first upload it into you asset manager,
Browse to find the image on your computer.
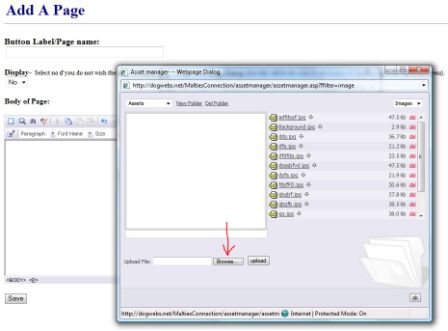
Click upload
then select the image
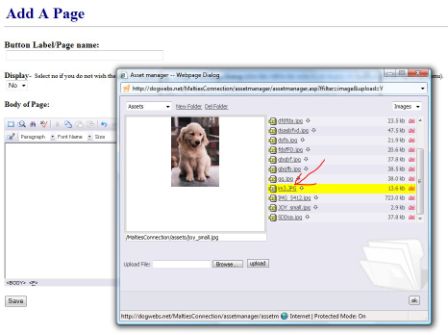
and click OK

Then click Insert
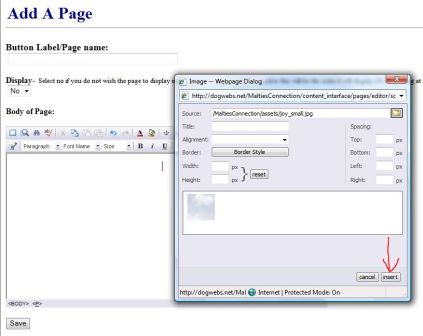
The image will now show on the page, use the
Save button to save the page.
If the OK button does not show for you, please try Maximizing the Asset Manager Dialogue box to view the OK Button.
See the video - Tutorial Videos
Working with images - How to get you images the right size.